Blog — December , 2018
December 1-8, 2018
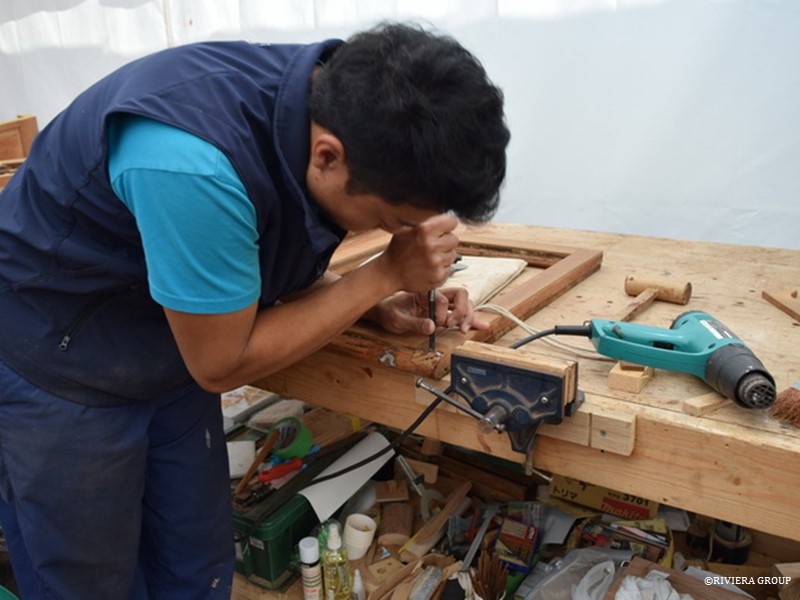
Now that the skylight bases have been assembled, Hashimoto is turning his attention to the frames for the glass. The frames had been originally assembled using natural products like linseed oil and red lead, so they were easy to take apart. We clean the pieces that are salvageable before making local repairs. Meanwhile, the joints are cleaned and reassembled. We could have used epoxy but decided not to since that would make them irreparable in the future without breaking them apart. We could have used liquid rubber adhesive but we’d have to wait for it to arrive. Instead, we used the old method of lead powder, linseed oil, wet varnish and calcium carbonate so the joints can be easily serviced in the future (if necessary).
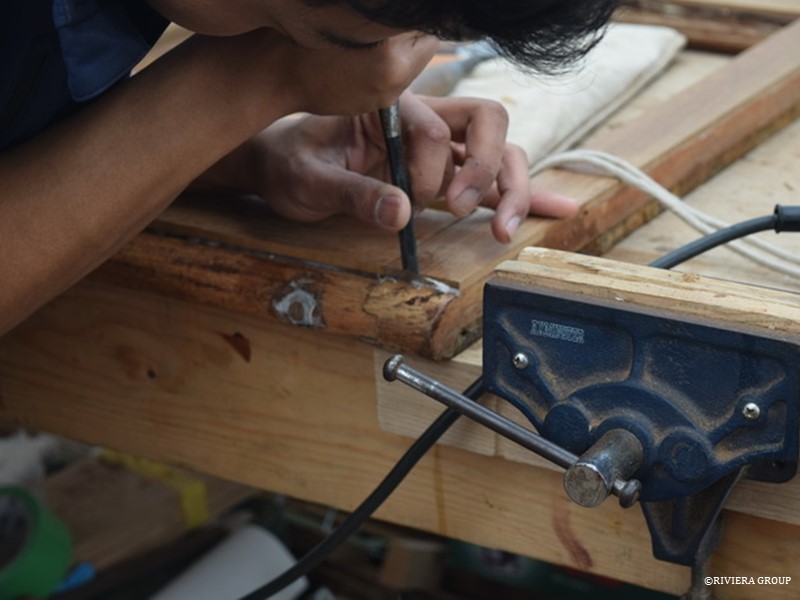
Hashimoto is cleaning up after a local repair in the frame. The sashes have copper drain holes that allow rain water runoff from the glass to drain from the inside of the frame and out through the molded edge on the lower edge of the frame. These pipes had corroded and so the holes were bunged and new copper pipe fitted.
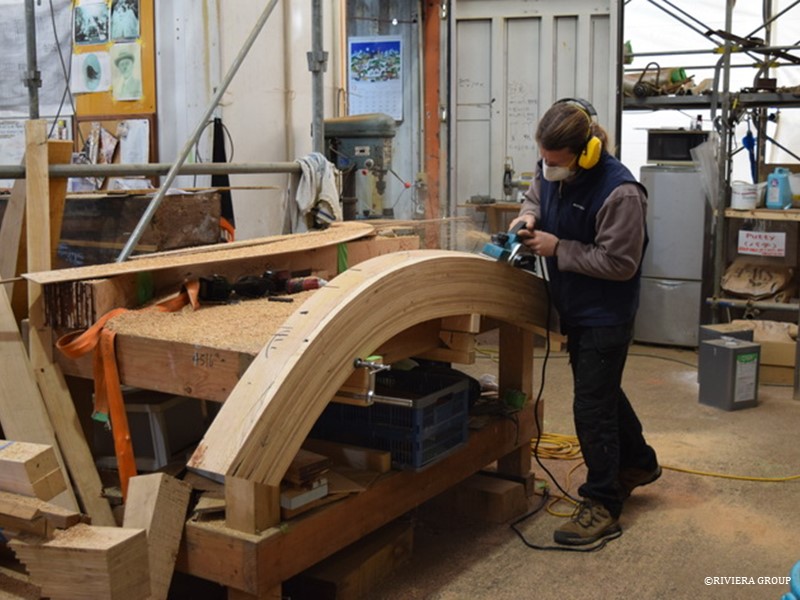
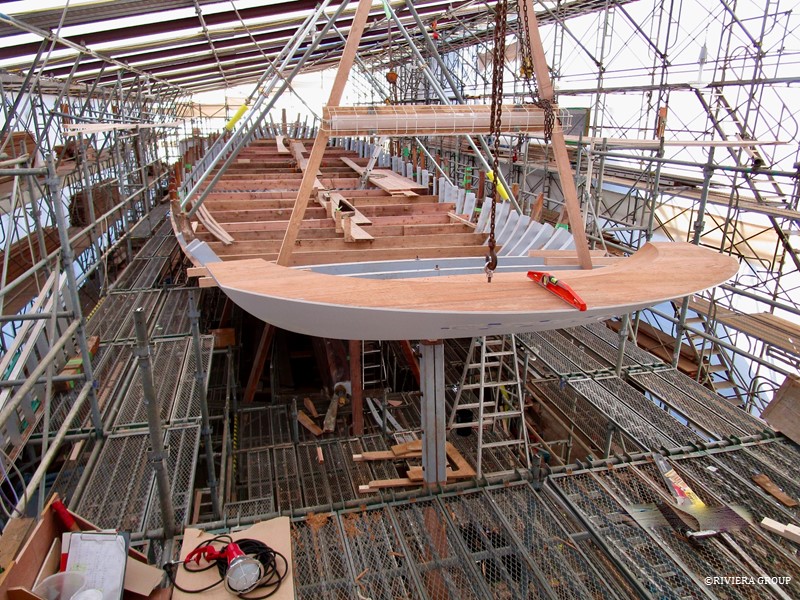
Graham tackles one of the large laminated frames that make up the counter stern. There is a lot of curve to these frames and our oak stock does not carry the crooks and bends in the grain that would accommodate them. The single frames in the stern, stem and some of the more shaped futtocks in the tuck of the hull are laminated oak. This is a little extra work but will make a very strong structure.
December 8-16 , 2018
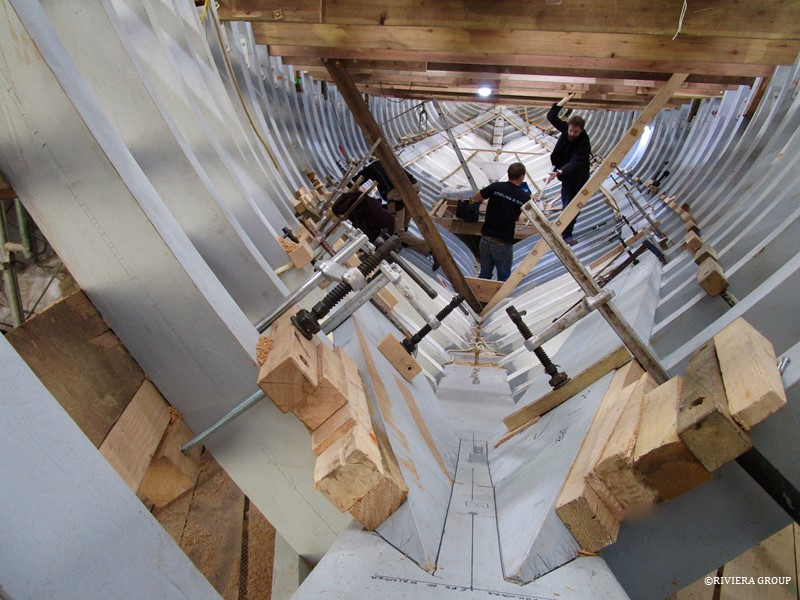
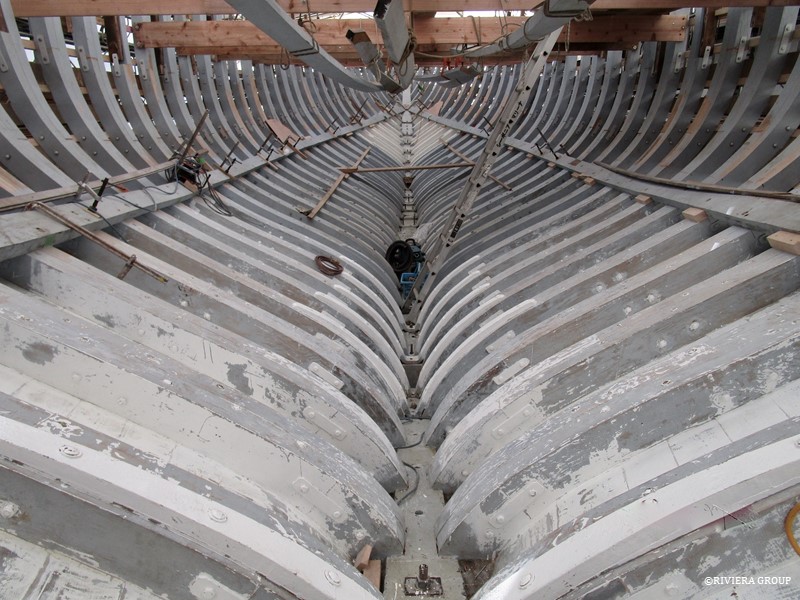
Now that framing is almost complete, the double bilge stringers are being fitted. Mattis and Richard fit the first of the 6 ¾” x 2 ½” oak stringers. A second stringer will be fitted alongside. These are riveted through the frames and planks together. The stringers provide longitudinal strength along the center of the hull structure between the deck and the keel. Stringers are important structural components of any boat. With these installed, the hull will become much stronger in withstanding a possible side impact, such as a collision at sea. Also resistance to longitudinal hull twist will improve markedly at a cost of very little extra weight.
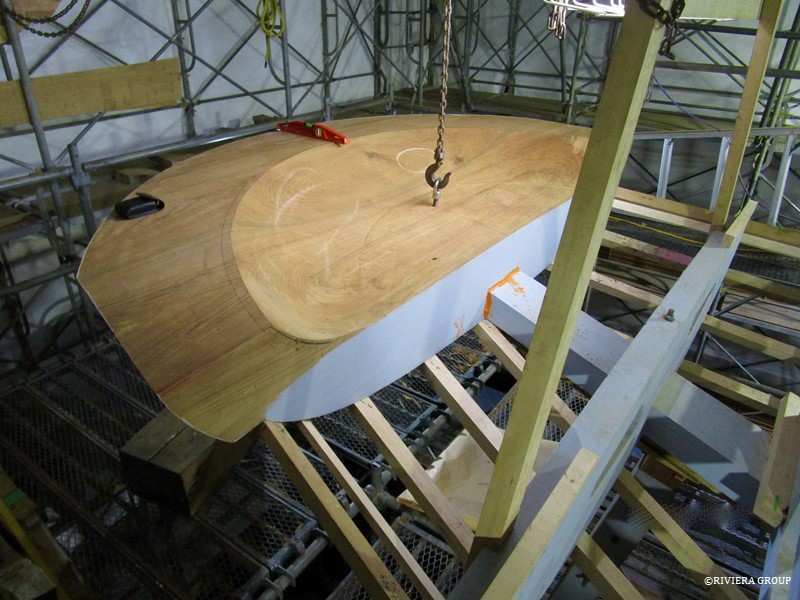
We attached a lifting eye in the stern chock making fitting and removal easy. Now the chock is permanently fastened to the horn timber that helps support the weight of the chock. More material will be removed from the chock to accommodate the deck planking and a final fairing will be needed after the planking is complete but for now, the chock is bedded onto the horning timber with lead putty and a bolt through the center.
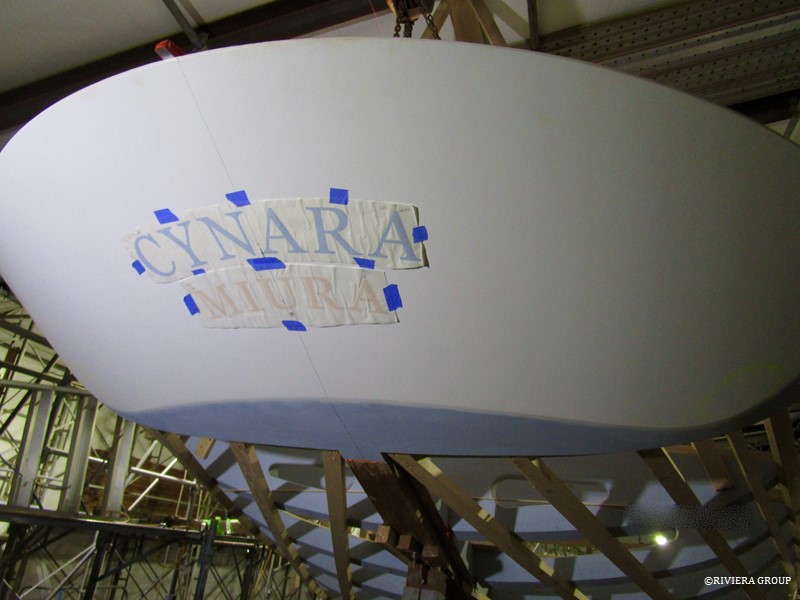
Paul did a trial fit of the name and home port to check the font and the positioning. It’s obvious here that it is positioned too low on the chock. After consultation with the Mr. Watanabe, we decided to change the font. The coat of paint helps seal the exposed end grain of the teak and prevent any checking of the wood. It also shows the name better for positioning. Although this part of the chock is finished, some further fairing will be necessary after planking is complete.
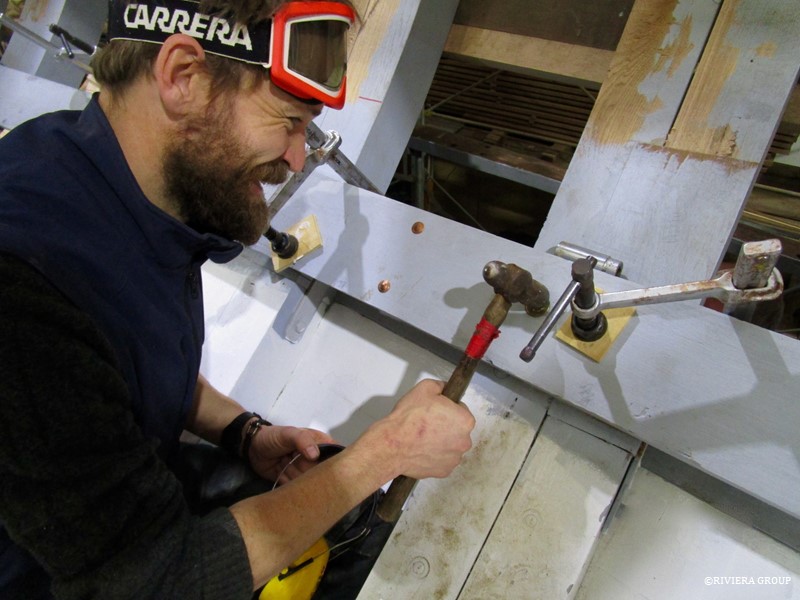
An action shot of Mattis mid-rivet. 5/8” naval brass rod is used for the rivets on the stringers. The two smaller copper rivets seen are to secure the scarf ends where the old and new stringer sections meet.
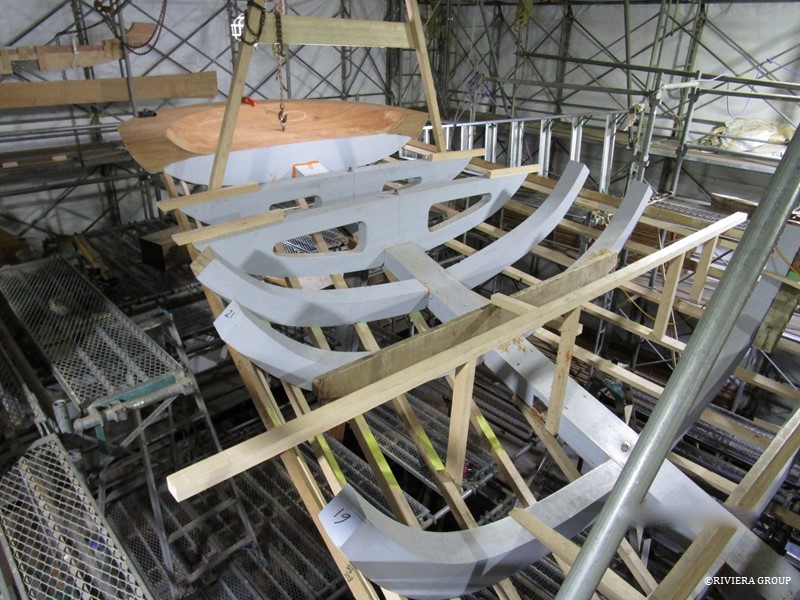
Framing of the aft section is almost finished, with only one pair to fit.
December 20 , 2018

A temporary pine frame is fitted across the area where the last of the counter stern hull frames are to be fitted. Graham was getting some unexpected readings from his measurements in this area. We discovered that the ribbands had a flat spot where they spanned the gap either side of the frame he was measuring. We had to push the ribbands out by a few millimeters to restore fairness. The shape in this area is very complicated and maintaining fairness is crucial. A flat spot in the ribband would have meant a flat spot in the planking when attached. Or equally as bad, a plank with a gap between its inner surface and the frame face.
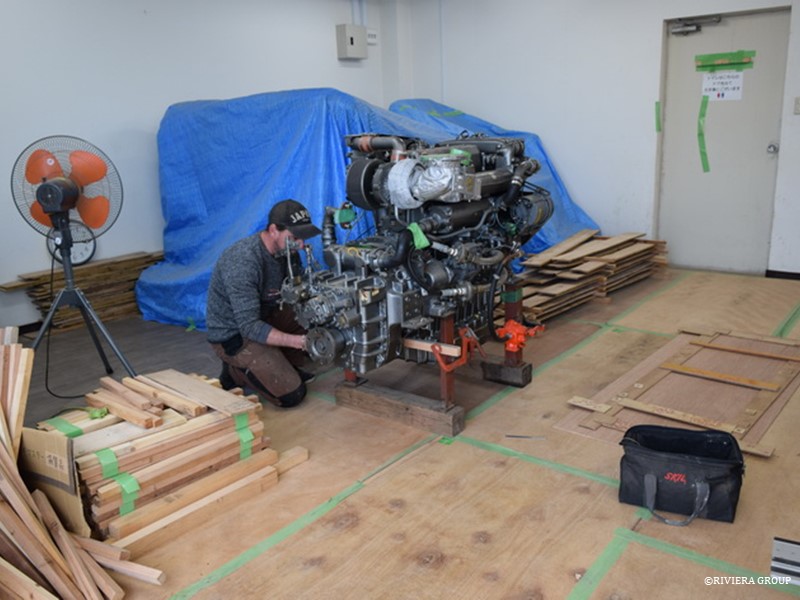
Ben takes a look at the engine mounts on our re-conditioned Yanmar. New mounts will be fitted and measurements are needed to set the new wooden engine beds correctly.
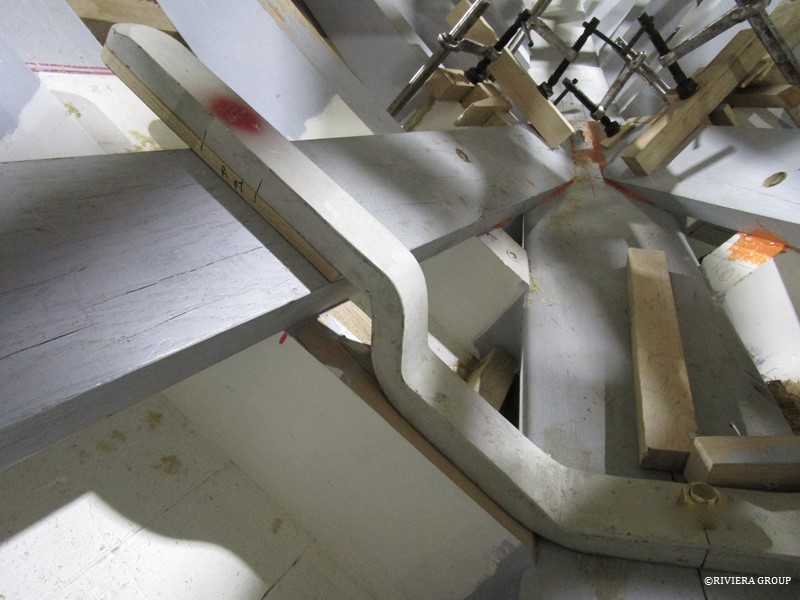
This iron floor dry fitted at the stem needs to fit snuggly against the timber. There will be another stringer under the end of the tang that’s floating mid-air. The original shipyard of Camper and Nicholsons would have had blacksmiths onsite or at least very close to hand when Cynara was built in 1927. But our iron workers were in the UK, thousands of miles away. The old floors had been sent to Topp & Co with patterns, and we trusted that they would fit when returned. To our relief they did. Most fitted well but there were a few discrepancies, which was inevitable for such complex shapes. In those cases, wooden shims are fitted to fill any voids.
Sometimes it’s necessary to bite the bullet. We are not sure what went wrong but to our disappointment we found that the top coat had not bonded to the primer and the paint was easily knocked off. We left it for some time in the hope that it hadn’t had enough time to completely dry, but it was soon clear that there was some other issue. The primer bonded to the timber and so it was not a contaminated timber issue. We had no choice but to remove the top coats and start over. This was a good lesson for all of us.
From now on, each coat would be monitored for the correct solvent percentage, and thermometers and moisture meters fitted around the workshop. Substrates would be checked for dust and grease. Painting would only be done if conditions were right. After this we had no further issues apart from small isolated areas. Sometimes it takes cleaning up a mistake to remember the basics. It’s also easy to forget that these planks are 90 years old and have been submerged in sea water and oil and grease. Happily, the repaint was successful and nobody wanted a repeat of this process.
Follow Us

Restoration by RIVIERA GROUP
Restoration photos by Yoichi Yabe & RIVIERA GROUP
Text and photographs copyright © 2019
RIVIERA CO., LTD. All rights reserved.
Email : pr@riviera.co.jp