Blog — Tuesday, 19 November, 2019

Blog — Tuesday, 19 November, 2019

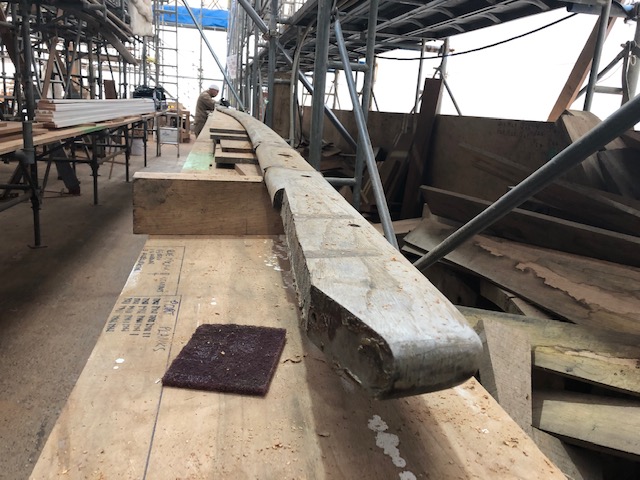
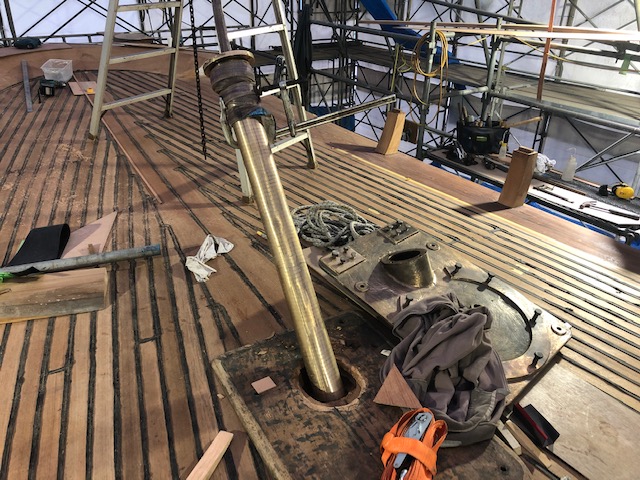
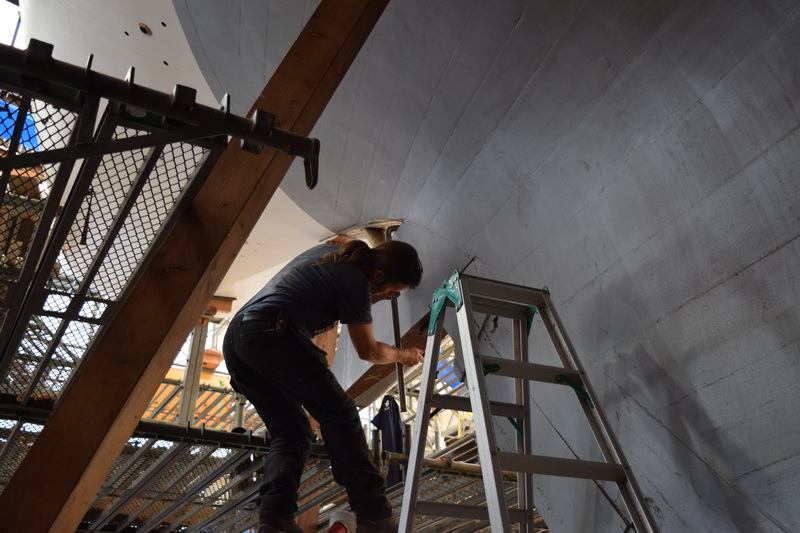
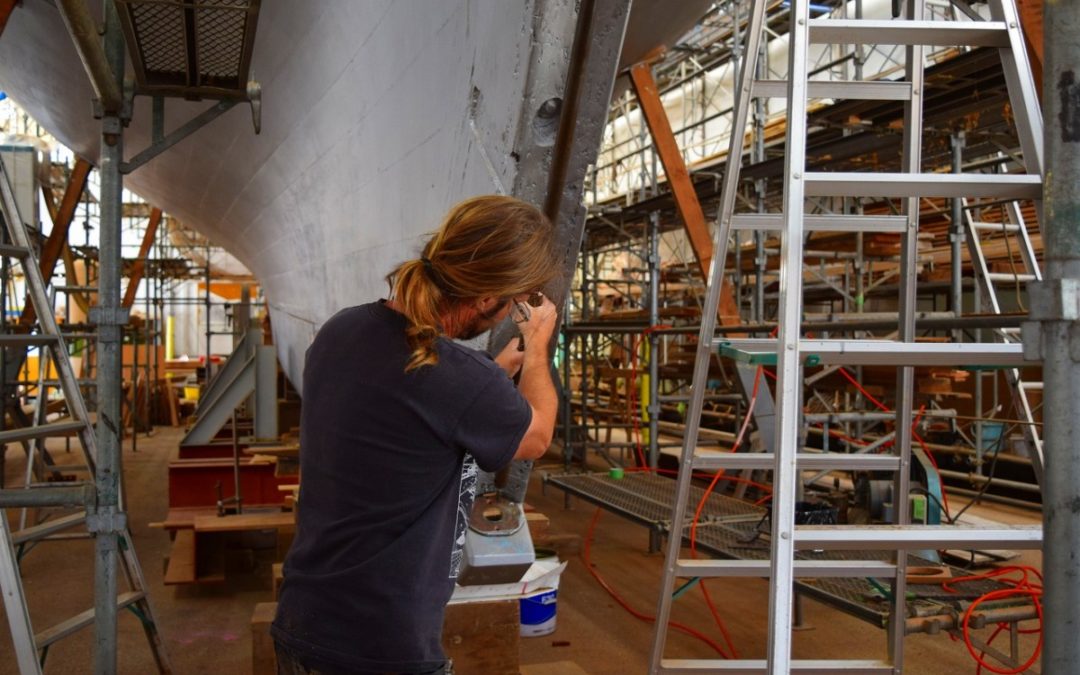
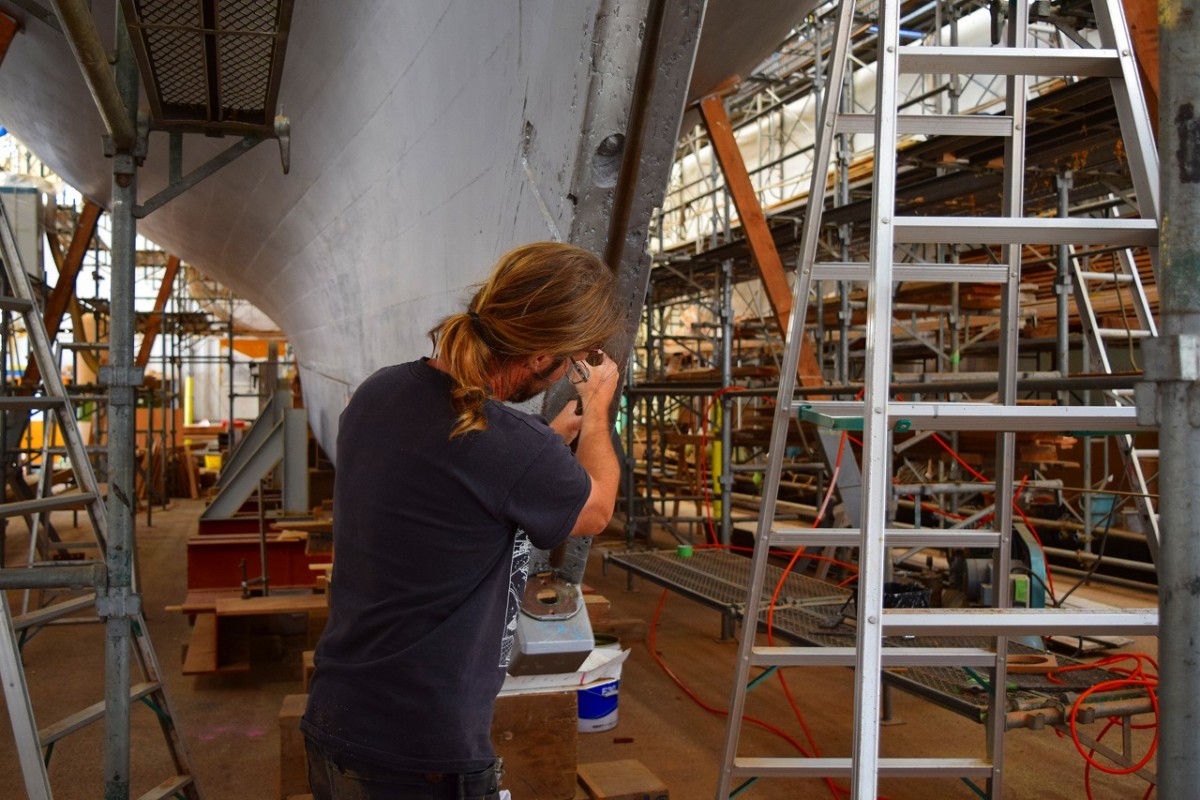
On Monday, forecasts of a storm that night had everyone preparing. But that didn’t stop Mattis and Richard from working on the bow, drilling holes for the hawsepipe and for the bowsprit. The steering gear pedestal was installed before the rudder stock was done, and is now ready to be connected to the rudder shaft.

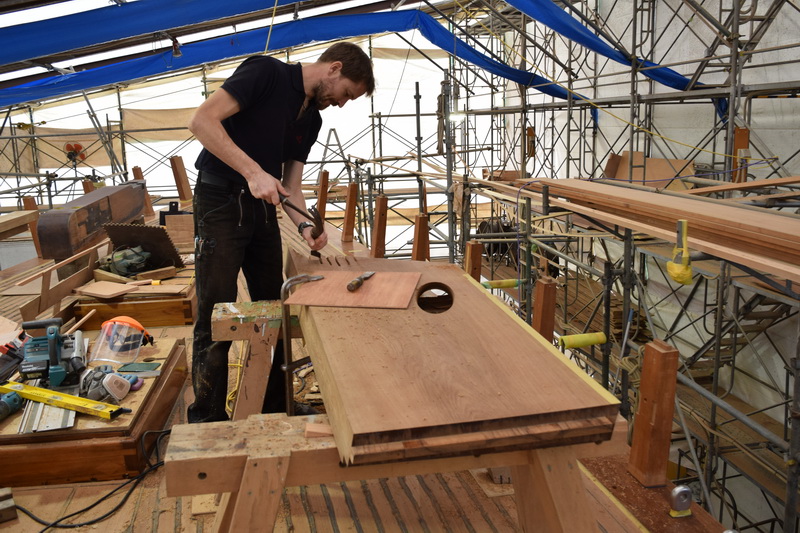
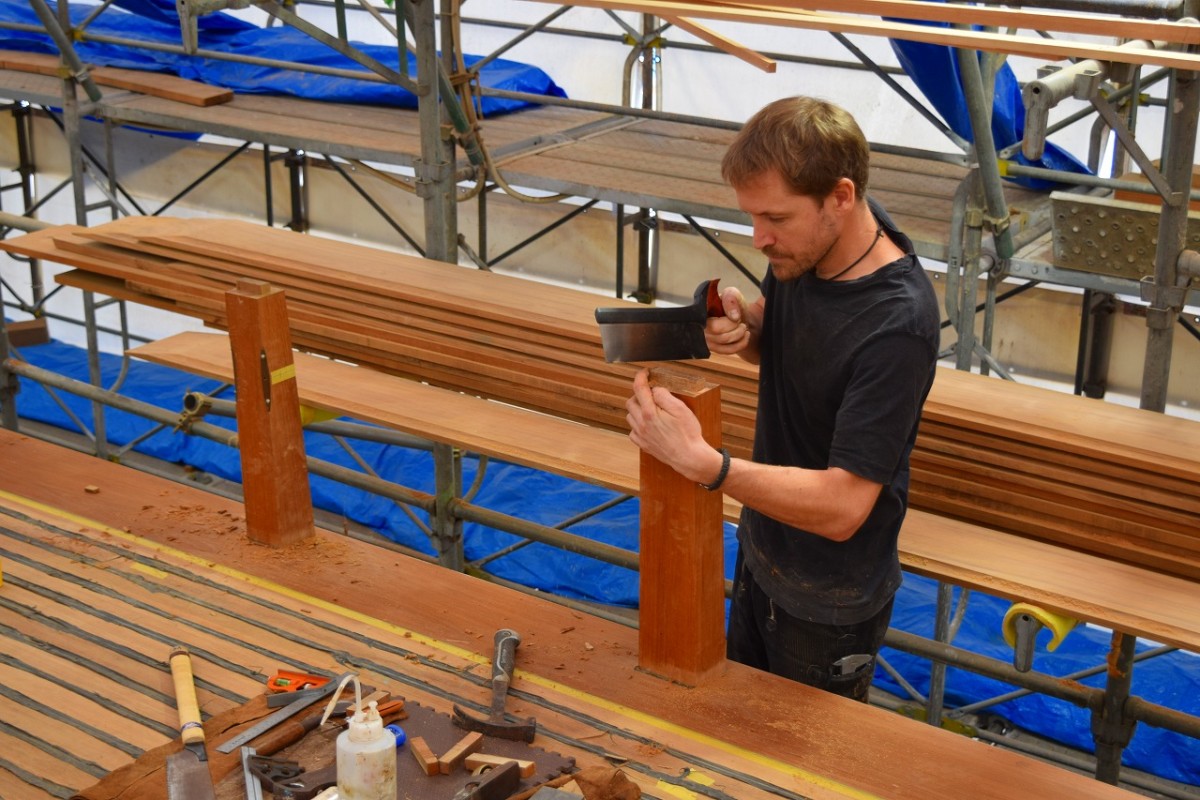
Lewis was working on the mahogany interior paneling, using his professional skills to work out the complex shapes of the panels and other interior fixtures with Tatsumi.

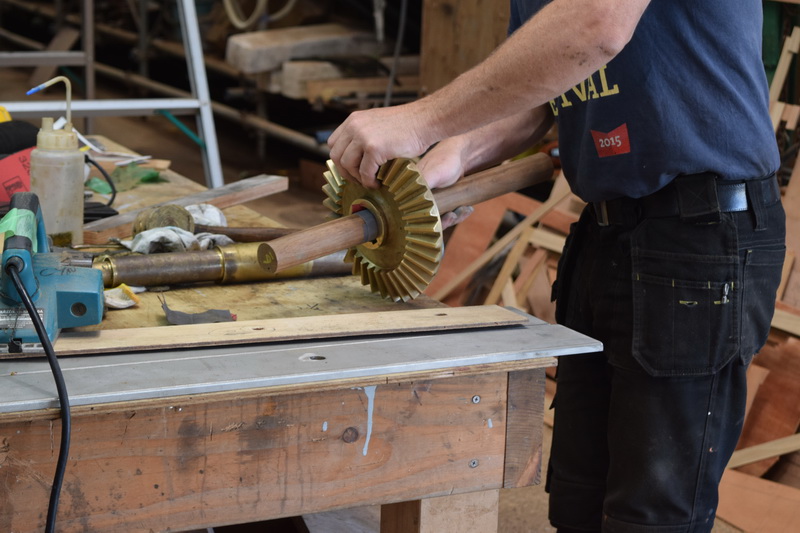
Graham and Paul started to assemble the rudder shaft and steering gear today. It took some precision work to interconnect all the almost 100-year-old bronze parts of the original (which have been serviced with a new gear cut) to achieve silky smooth rotation with no binding. As with other parts of the boat, as much as possible of the original materials were being used. In this case, we almost achieved the magic 100 percent reuse figure.

The electrical engineers, Reece and Daniel, carried on 12 batteries and installed them below.

              And a government ships inspector came by to do a pre-test of the airtightness of Cynara’s brand new steel engine bulkhead. Some leaks were discovered and will be fixed by the time of the actual inspection.
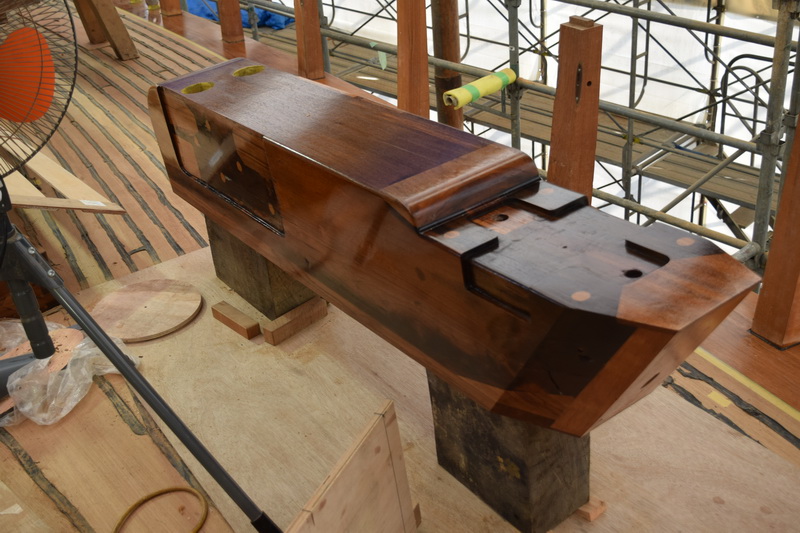
 

Beautifully restored bowsprit chock.


Graham fitting the steering bevel gear onto its shaft.

Follow Us

Restoration by RIVIERA GROUP

Restoration photos by Yoichi Yabe & RIVIERA GROUP

Text and photographs copyright © 2019
RIVIERA CO., LTD. All rights reserved.
Email : pr@riviera.co.jp

Blog — Friday,15 November, 2019

Blog — Friday,15 November, 2019

The week began, as every week does, with Paul going over the schedule with everyone. He sees everything, and he gives advice to newcomers, even on how to sweep, telling them, “As you sweep, take a good look at what each person is doing.”

The hole for the rudder tube leading up to the deck was completed, and Monday saw Graham and Richard trial fit the rudder tube in the hole to check the clearances. The tube was placed in the hole again and again until the fit was perfect.

By Wednesday, the rudder stock was in place, the next step before installation of the quadrant, the steering gear and finally the ships wheel which will steer the ship of almost 100 tons with no power assistance whatsoever, quite a remarkable feat.

Mattis and Richard continued work preparing the caprails for installation atop the stanchions. The teak planks which will be used as the wash-strake (the lowest plank in the bulwalk) are steamed in order to bend them to a graceful curve as they attach to the stanchions.

Feargus, the project manager, arrived on Wednesday evening. He was here through the rest of the week, and a lot of time was spent confirming the schedule, the arrival of parts and the situation of the restoration with Paul and Ben. On Thursday, there were meetings regarding the ship inspection and also how to move Cynara from her tent to the water’s edge.

Today, two holes for the anchor chain or hawsepipes were drilled through the knightheads chocks (the heavy bulwark timbers either side of the bow). Once again, the boring bar came in handy.

The same day, two UK electrical engineers arrived to check the wiring diagrams and discuss how to proceed.

And, varnishing the masts continues.


Checking the fit of the rudder shaft tube in the hole.


Graham carefully boring out the rudder shaft tube hole.


Mattis cutting a rebate in the knighthead chock.


Follow Us

Restoration by RIVIERA GROUP

Restoration photos by Yoichi Yabe & RIVIERA GROUP

Text and photographs copyright © 2019
RIVIERA CO., LTD. All rights reserved.
Email : pr@riviera.co.jp

Blog — Friday, 8 November, 2019

Blog — Friday, 8 November, 2019

The week was a productive one, with progress made in many areas. Mattis and Richard began the week by trial-fitting the tenon joints on the top of the stanchions, where the capping rails will be attached. Graham continued drilling the hole for the rudder stock tube from the bottom of the boat, using a boring bar. The bar was based on a standard boring bar with brass screw clamps, using a design suggested by Jesper Olson in Sweden. It was built by local Japanese engineers last year for drilling the 2-meter long hole for the propeller shaft tube, and it’s come in quite handy. This is the third task it’s been used for. Aligning the hole for the rudder shaft tube, through to where it is retained at deck level by a flange inside a bronze pedestal that holds the steering mechanism, quadrant etc, is a very labour-intensive job.

Wada continued to add coats of varnish to the mast, under the watchful eye of Paul.

By mid-week, Mattis and Richard had started to install the capping rails onto the finished stanchions. The shape is very important; both sides of the rail are in an elegant C shape that is easy to grip. The finish work these two shipwrights are doing is really spectacular.

Takamiya met with Ms. Kitajima of SPICE to discuss the details on interior finishings. Feargus has made a number of suggestions regarding fabric, furniture, door handles, etc. and SPICE seems to carry a wide variety of samples. Paul had also prepared samples of how the walls and floors will look, which helped to create an image of how the interior of a classic yacht should look.

Today, the hole for the rudder tube is almost done. Graham moved quickly from the deck to below the boat and back again, checking to make sure the alignment is perfect. Graham’s rudder tube alignment work was equally as complex as Lewis’ work on drilling the hole for the propeller shaft tube. It’s clear that Paul assigns these difficult tasks to these seasoned shipwrights, who have a lot of experience between them.

And varnishing the masts continues. It’s a painstakingly repetitive process, but every day the sheen of the finish takes on a deeper gloss.


Mattis preparing the stanchion / capping rail joints.


Graham drilling the hole for the rudder tube.


Japanese members varnishing the masts. 

Follow Us

Restoration by RIVIERA GROUP

Restoration photos by Yoichi Yabe & RIVIERA GROUP

Text and photographs copyright © 2019
RIVIERA CO., LTD. All rights reserved.
Email : pr@riviera.co.jp

Blog — Wednesday , 30 October, 2019

Blog — Wednesday , 30 October, 2019

Tues. Oct. 22

With the deck planking done, we have the entire deck as a workspace. Nico is working on the bowsprit chock, and can now put in temporary place to make sure it fits. It is a sizable piece of wood and is all original.


Further back, Richard is drilling and setting out deck fittings in the coverboard.


Wed., Oct. 23

Tatsumi and Kawashima are working on the wall partitions for the interior. The wood is poplar, not often used in Japan. Paul says he chose this because it works well for painted surfaces, and because Camper and Nicholsons, who built the boat in 1927, used it in the original.


Thurs. Oct. 24

Richard, the engineer, is in his element in the engine room, and he can get possessive over his responsibilities (“This is my room,” he jokes.) It’s partly true: there is more engineering than woodwork since everything—metal tables for the generators, the engine, pumps, etc.—all have to be set up correctly for the engine to be easy to use and maintain in a limited space.


Wed. Oct .30

Richard the carpenter’s next step on board is to cut the top of the wooden stanchions down to the correct height (above) while another Japanese team member sands the coverboard, preparing for the first coat of varnish (below).


Wada has taken a central role in the varnishing of the masts, which have become much darker in tone after many coats. It is a repetitive job that requires a lot of concentration.

Follow Us

Restoration by RIVIERA GROUP

Restoration photos by Yoichi Yabe & RIVIERA GROUP

Text and photographs copyright © 2019
RIVIERA CO., LTD. All rights reserved.
Email : pr@riviera.co.jp

Blog — Monday , 21 October, 2019

Blog — Monday , 21 October, 2019

Sun.Oct. 13

Typhoon Hagibis made landfall last night just west of us on the Izu Peninsula. It ended up being one of the largest typhoons ever recorded, with over 200,000 people ordered to evacuate, and the matches for the World Rugby Cup cancelled. It was fairly violent at our location, so we ended up being extremely lucky. Parts of the main tent blew down, and the deck has been saturated with water despite being covered with plastic sheeting. This is a major concern, as we’re in the middle of gluing the planks down. We’ll have to thoroughly dry and clean the deck before finishing the gluing.

Part of the adjacent tent where we’re doing the joinery collapsed under the weight of the water that had collected on top, but fortunately, there is no serious damage to the timber that is inside. There were a few scars and dents from wind damage, but the timber is old—with plenty of scars from its nearly 100 years of use, and there’s nothing that will be noticed.


Mon. Oct. 14

By 10:00am the next day, everything had been restored to pre-typhoon condition, and work is being renewed in all areas of the project.

The crew from Centerline Marine is back laying the deck. Some of them have started caulking while others are still focused on the planking. They are using a liquid rubber compound in the seams to form a rubber seal between the planks.


Tues. Oct. 15

Work is continuing on the interior. Here the original bulkhead framing is being installed in the aft end of the main saloon.


Fri. Oct. 18

The planking and caulking of the deck is finished, and the six-man team, who have been working dawn until dusk, will leave next Monday. The height of the finished caulking actually is higher than the teak planks, but it will shrink over time. It will be left like this for at least a couple of weeks to set, harden and shrink—the longer the better. It will then be cut and sanded flush with the teak planks.

Leaving the sanding as long as possible also protects the teak, since continuing work on the deck will get it dirty. Once the teak is sanded, it must be kept clean or the final appearance of the deck will be spoiled.

According to the plan, Paul and the other members of the crew will do the final sanding around the beginning of December.


Monday. Oct. 21

Nico is fitting two naval brass dovetail plates between the lead ballast keel and the wood false keel. The plates are riveted through the keel, which helps stop any movement between the two. Work on the rudder has begun (below) and the work on the keel must be finished before the rudder is installed.


Follow Us

Restoration by RIVIERA GROUP

Restoration photos by Yoichi Yabe & RIVIERA GROUP

Text and photographs copyright © 2019
RIVIERA CO., LTD. All rights reserved.
Email : pr@riviera.co.jp

Blog — Thursday , 10 October, 2019

Blog — Thursday , 10 October, 2019

Wed. Oct. 2

As we enter October, the temperature has fallen, which has made life a little easier for the shipwrights. But we’re still in the middle of typhoon season, and Cynara is protected only by a tent. A smaller tent stands adjacent—where work on the interior, the masts and the spars is being done.


Paul and Carlos (above) are onboard in the galley area, where the mast will pass through. They’re using temporary patterns and frames to check the positions of where the bulkheads and furniture will go.

On deck, Ben is fitting the rods that connect the deck to the hull. The rods are bolted through the deck and run down alongside the mast and into the mast step, and firmly bolted to the keel. They add strength around the mast, as the blocks and rigging will be putting high loads and stresses on the deck in this area.


A team from Southampton in the UK called Centerline Marine was brought in to lay the teak deck planking. Teak laying is a very time-consuming process, so this allowed Riviera’s team of shipwrights to focus on other tasks. The deck beams were first covered with a plywood sub-deck, which was first “faired” to ensure there were no high spots or hollows. Then the teak planks were laid on top, one by one. Each plank was machined to include the seam for caulking before they were glued down.


Tues. October. 8

Mike, from Centerline Marine, is removing any extra glue from the caulking seams. He also has to cut the butt joints between each plank end.


You can see from this photo that the planking is almost complete. The caulking between the planks is the next part of the process.


Thurs. Oct. 10

Work had to come to a halt in order to prepare for Typhoon Hagibis (Typhoon 19, as it’s called in Japan). We are storing all the important interior fittings, lashing the masts down (above), storing other parts in elevated containers (top) and taking other measures (middle) to protect the tents from the wind. According to weather reports, the typhoon is scheduled to come ashore very close to our location about October 12.

Follow Us

Restoration by RIVIERA GROUP

Restoration photos by Yoichi Yabe & RIVIERA GROUP

Text and photographs copyright © 2019
RIVIERA CO., LTD. All rights reserved.
Email : pr@riviera.co.jp