January 1-8 , 2019
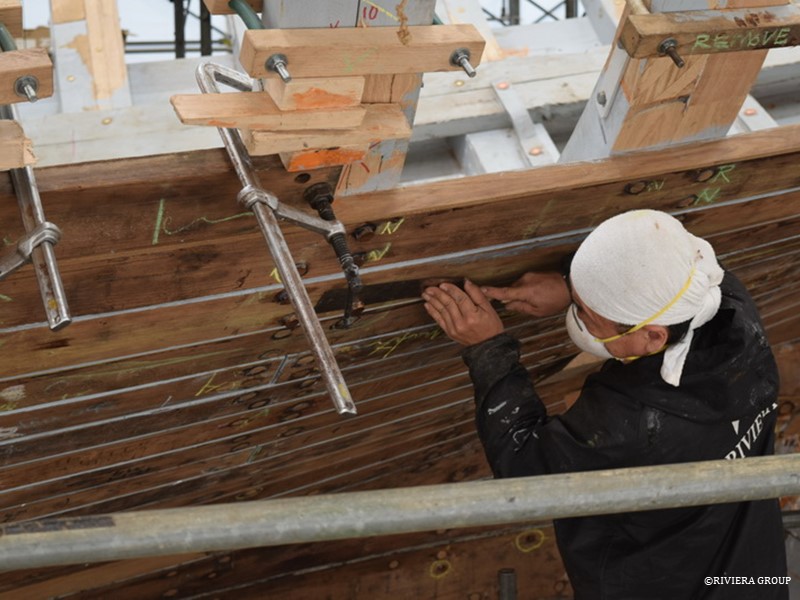
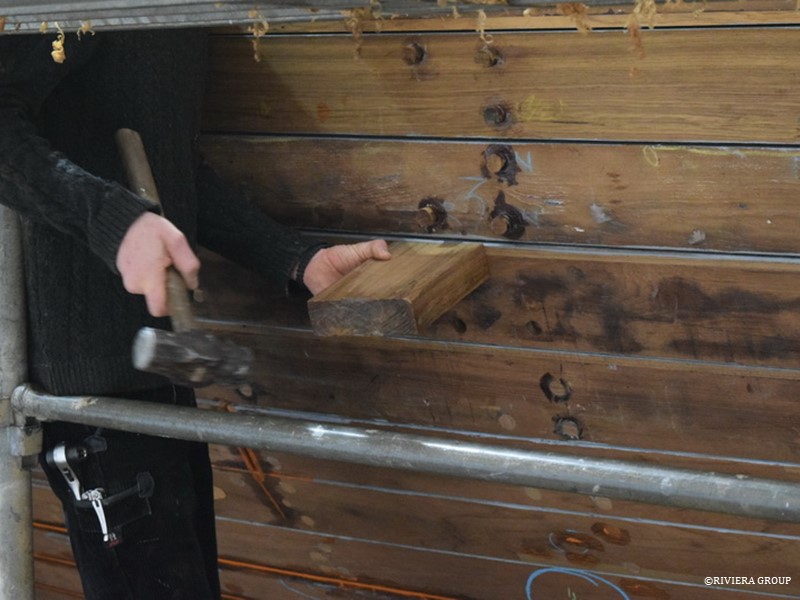
Makoto is cutting bungs flush with the hull planks. All in, there are thousands of bungs that all need to be cut, fitted and finished one by one.
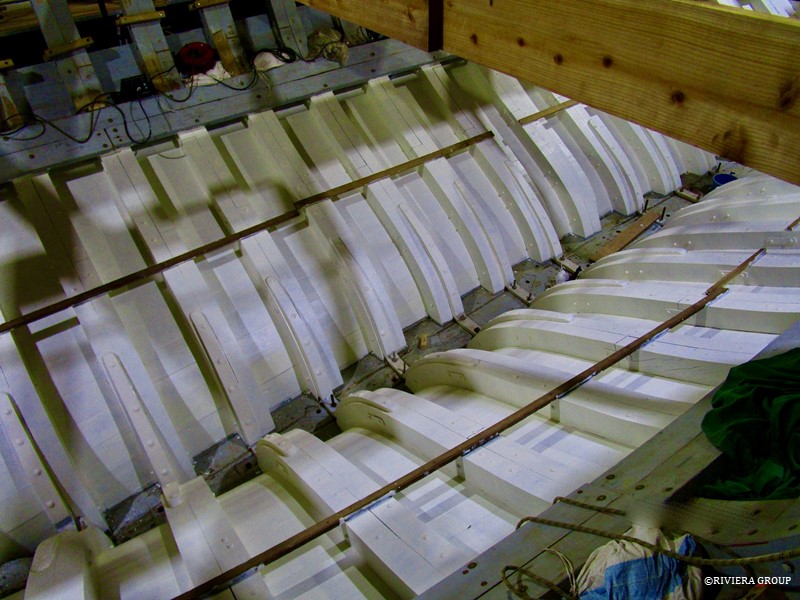
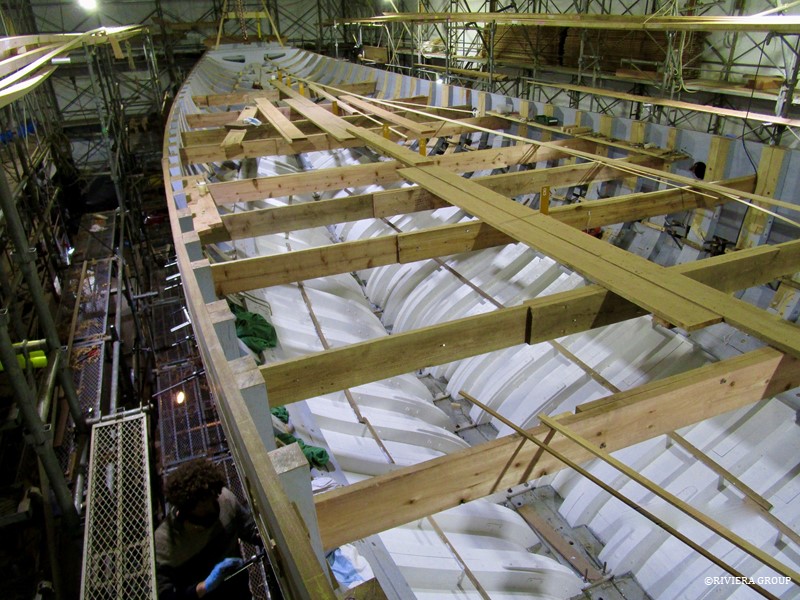
The freshly painted bilge. Hopefully this coat will be more successful than the first. Battens are nailed against the frames to create something to stand on when climbing up to reach the higher planks and rivets. Temporary bolts can be seen at the centerline which will be replaced with ¾” diameter, square-headed naval brass bolts that will secure the throats of the wrought iron floors to the keel timber. These are not the keel bolts which are fitted between the floors. One floor is fitted at each station or frame pair.

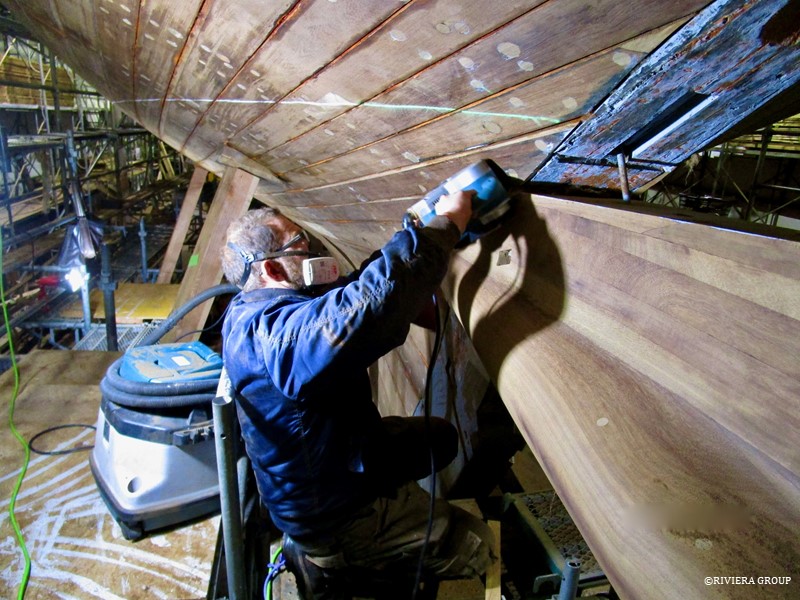
Above. Dan and Leo from Stirling & son get started on the initial fairing below the waterline with power planers. Once the planking is fair, sanders will be used to remove tool marks. Because the old planks have been sanded before during their lifetime (possibly many times), and are now snugged hard against the new frames, some plank edges are proud and need to be made flush with their neighboring plank.
As much attention will be paid to the fairness of the planking below the waterline as above it But longboards will be used above the waterline to achieve a good, fair surface for painting and a finer finish than is needed below.
Jonathan has been called in from the joiners shop, where he’s working on the main deck house, to help with the final strakes. All hands are needed to get the planking finished as soon as possible so that the caulking team can move ahead.
Demetri checks frame fairness with a ribband at the counter stern. Adjustments are made where necessary to ensure the planks fay nicely against the face of each frame.
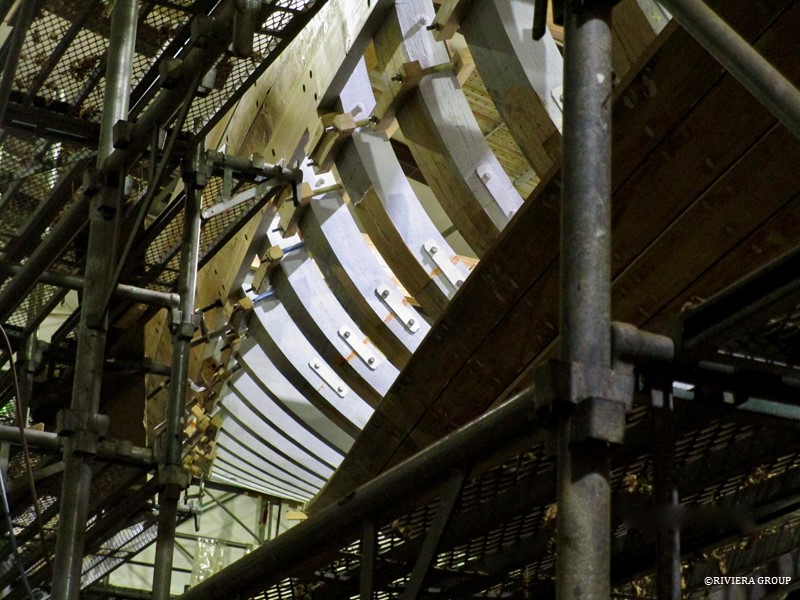
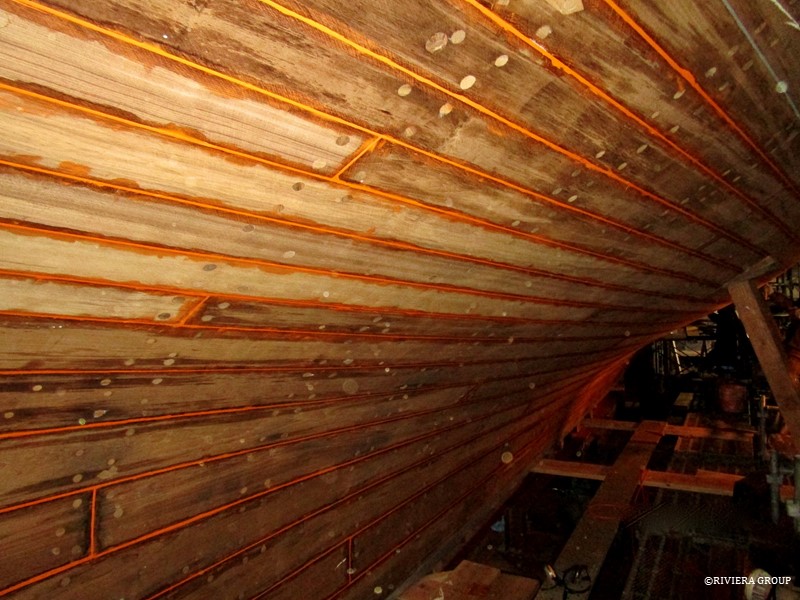
A light inside the hull highlights the shape and shows clearly the twist in the transition from the counter into the midships

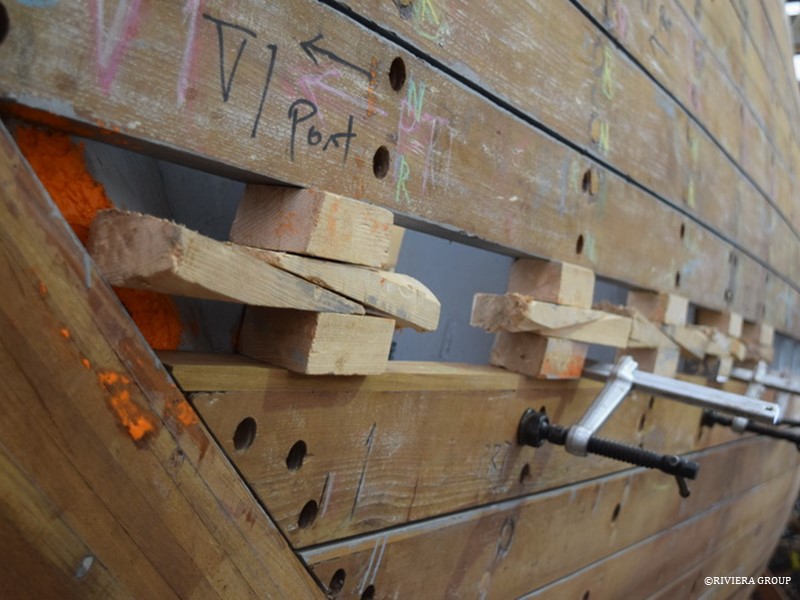
The last four strakes on the port side are laid together to measure their combined width. Using old planking means the gap left by the fitted planks has to be carefully monitored so that there is enough space left for a good fit with the final strakes. With four to go, the strakes can be adjusted 1 or 2 mm from the edges to allow for adjustment. A spline can be glued to an edge should the space be too wide. A combination is the most likely outcome so that the plank edges have fresh and fair caulking seams. An even gap is the most important factor.
Dan works at the stern post fairing the junction between the stern post and prop shaft log. This is a complicated shape and has the tightest curves in the hull.
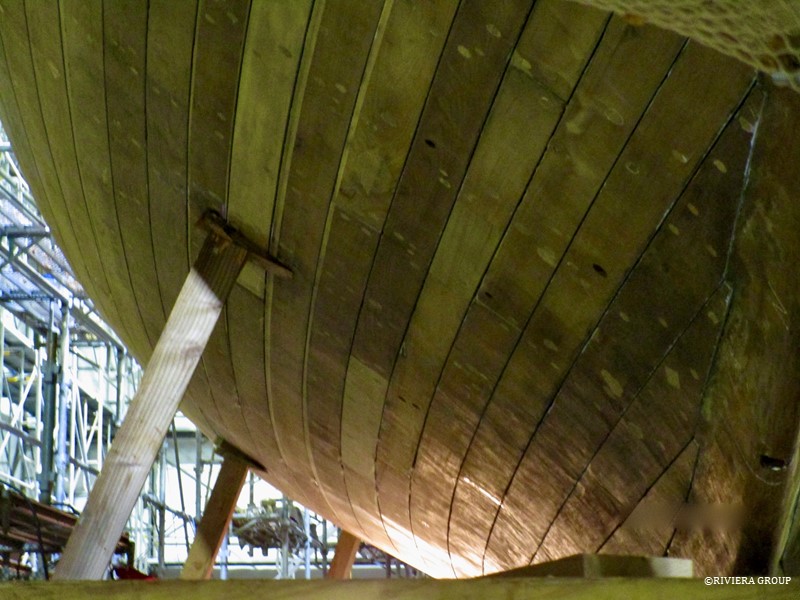
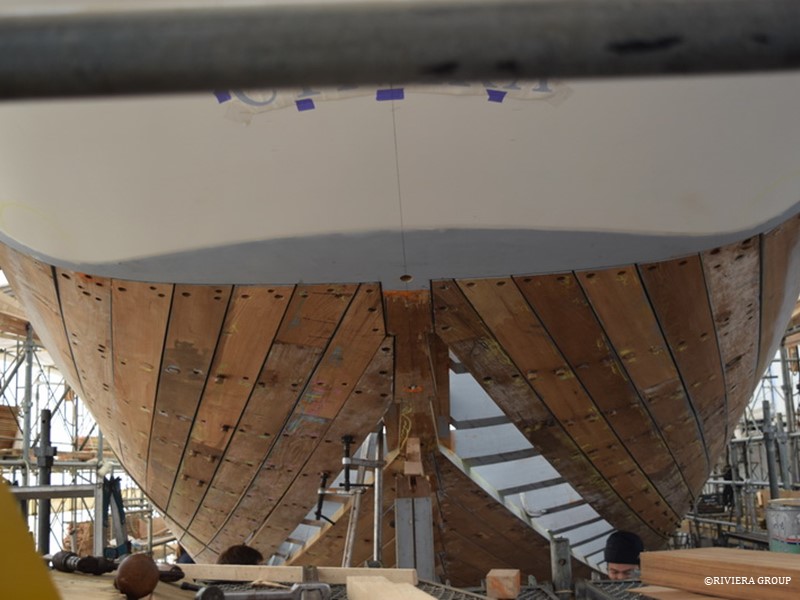
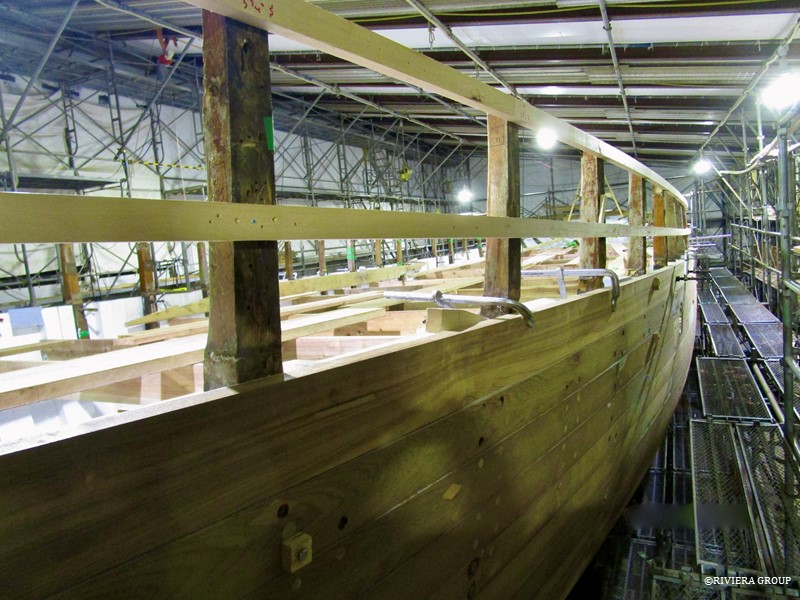
Cynara’s starboard side (here looking aft) is complete after a first fairing and is looking in good shape. Further fairing will be done after the caulking.

The inclinometer shows the angle of heel when the ship is underway. Although certainly very old and part of Cynara’s inventory for many years, it is not thought to be an original part from C&N. However, as we believe it has been onboard from her very early days we decided to restore and refit. The inclinometer was shipped to Greybeard Yachting in the UK for restoration.
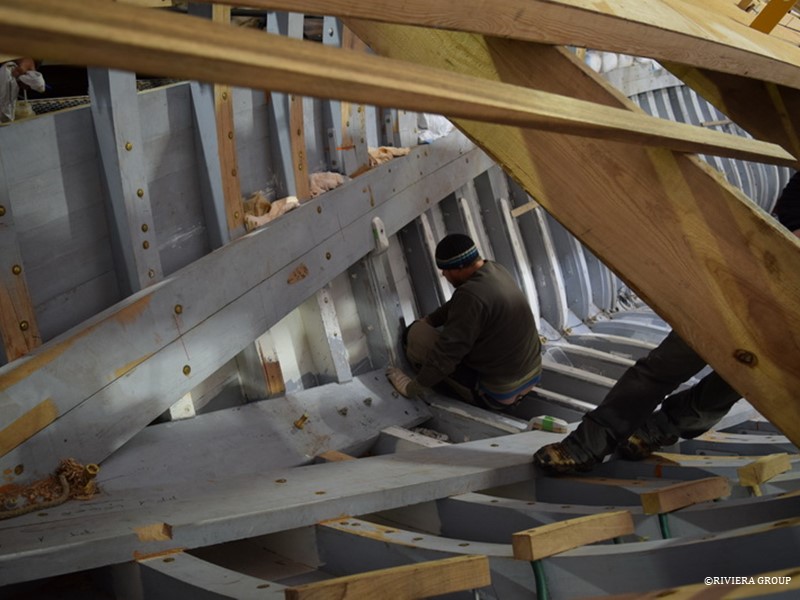
Richard Sills, our resident engineer, is helping fit floors in the stem area. The floors are drilled for 5/8” copper rivets that are driven through frame and planks. Drilling must be done with great care to avoid existing fasteners and reuse the previously counterbored hole in the original planking. Plugging and re-drilling a fresh hole in the plank is an option but this would render the plank too weak. Using the original holes is slightly more difficult but maintains the overall strength needed in the teak plank over the frame.
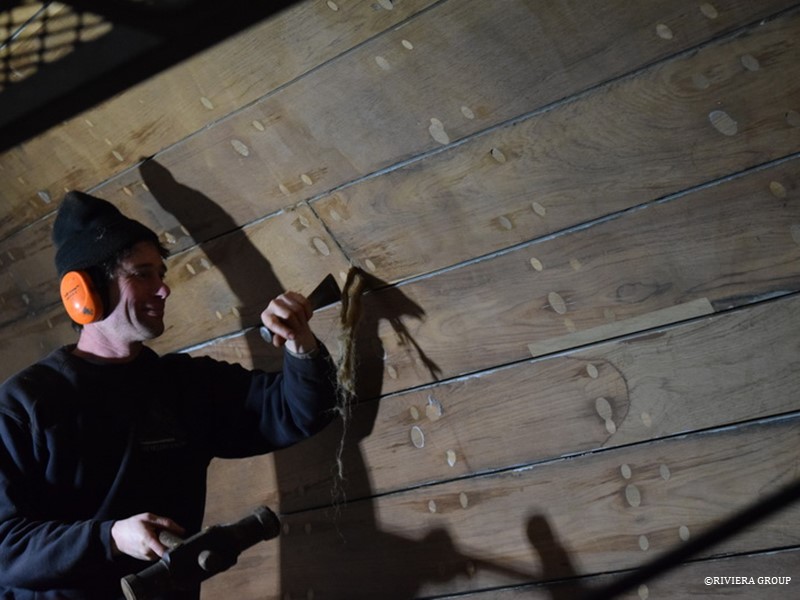
Even though the last strakes are still being fitted, Will Stirling starts with the caulking process on the lower planks, first concentrating on the butt joints. Traditional caulking with oakum is a skill and trade in its own right. The oakum not only seals the joint between planks but also adds stiffness to the hull. Knowing how much and how hard to apply the oakum can only be learned by experience. Cynara’s oakum was laid in several layers making sure to fill the entire seam leaving just enough space to finish with red lead putty below the waterline and teak splines above.
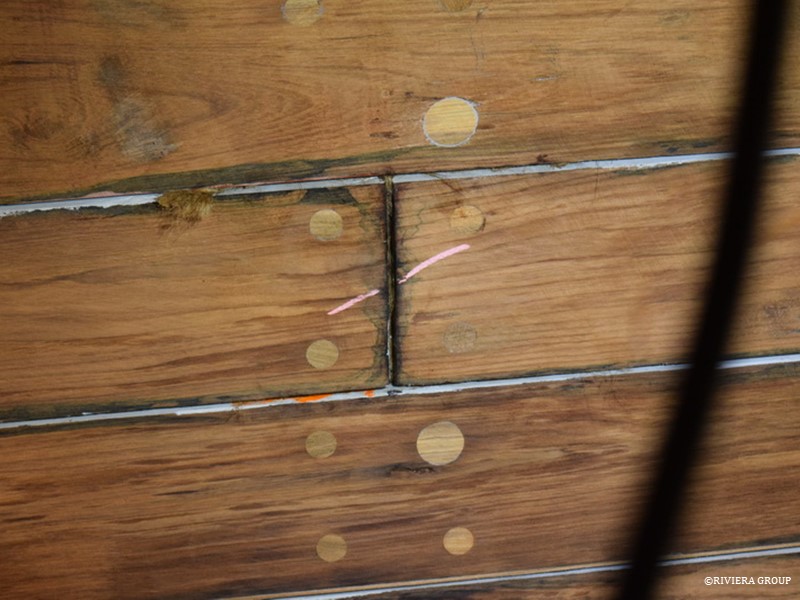
One of the butt joints after caulking
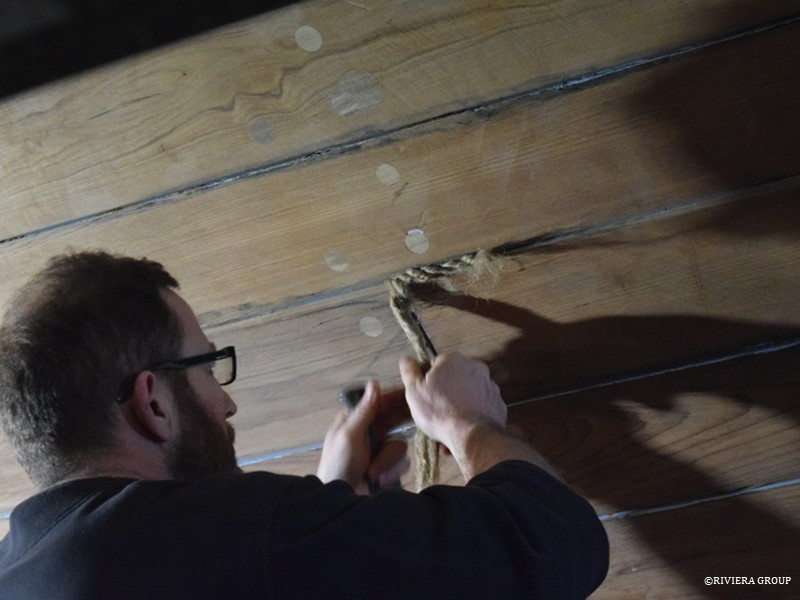
Dan gets started with some caulking, giving the oakum a gentle twist before hammering it into the seam
Graham and Mattis at work at the stern, where there is the added difficulty of making sure the hood ends fit well at the stern chock. There is a lot of twist here and a fair plank line must be maintained.
February 8-15
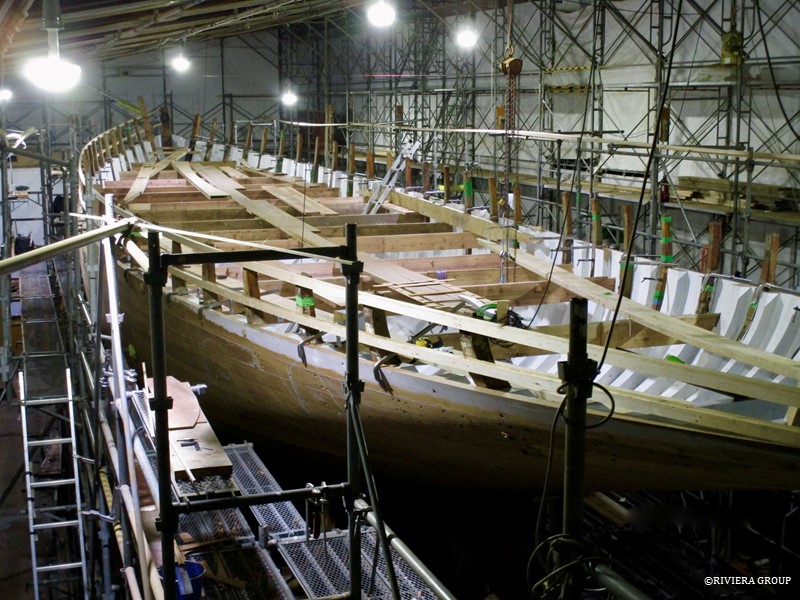
The hull looking aft. The planking is almost complete, with only single strakes left, port and starboard. Arthur, a French shipwright, can be seen working at the bottom left of the picture. The position of the engine beds can be considered at this point, and construction planned. There is more space before the main engine room bulkhead is installed and restricts movement in this area.

Joaquin Fernandez of Stirling and Son caulks at the hood end of the port side garboard strake. Joaquin is a Spanish boat builder currently working in the UK and belongs to the specialist caulking team.
Mattis works on one of the last strakes to be fitted.
With the lower bilge complete, Ben has begun working on new timber engine beds. Although they are still strong, the old beds were built for a different engine and have had multiple alterations and modifications over the years. Cynara has probably had several engines before the current Yanmar and this was our opportunity to make beds that fit this specific engine. Next to Ben is the oak beam shelf, which is being prepared while the final planks are being fitted, and the long, hooked scarfs in the end of each section.
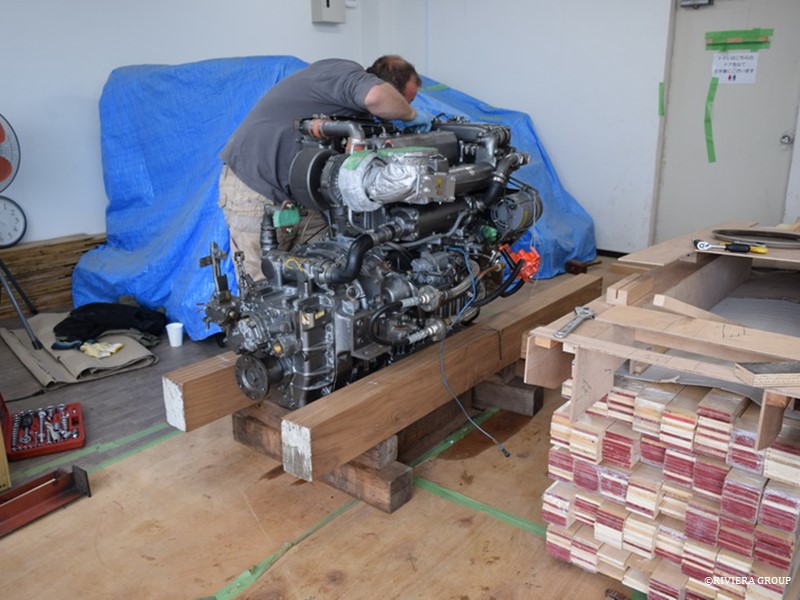
Richard starts preparation for the engine and engine bed installation.
February 15-22
The penultimate strake at the stem goes in with the help of clamps and wedges.
The final strakes will soon be fitted and so the end is in sight for the planking. Attention is now turning to the next phase of the restoration. The stern chock has had an initial fairing and Cynara’s name is being set out on the face of the chock. While the chock is not finished different letter sizes and fonts are being considered.
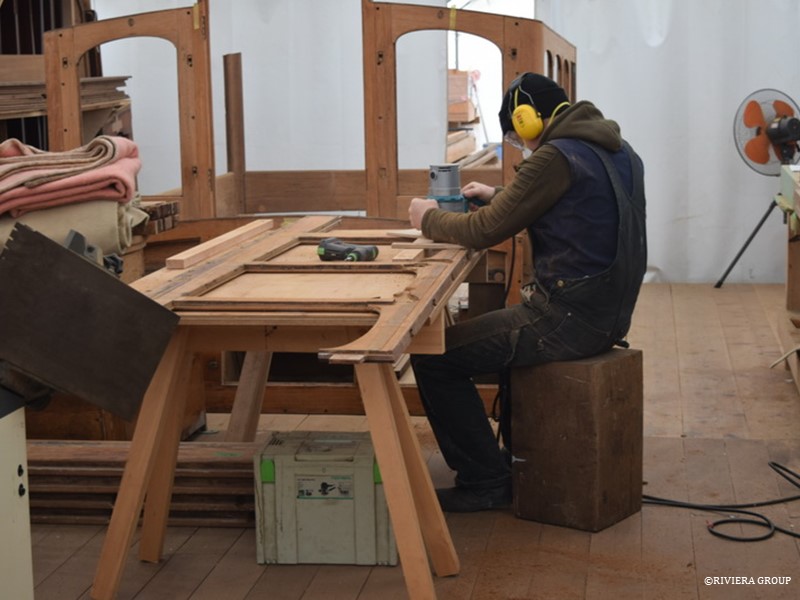
Now that the planking is on track, the focus is back in the joinery shop where we continue to methodically restore the main deck house. The original construction method allowed us to completely dismantle the entire structure. In fact, no glue at all was used in Cynara’s entire original construction. Our intention is to follow this approach. Though modern glues are used to affect local repairs that would not allow us to otherwise salvage original parts, each component, whether original, repaired or new, is jointed traditionally with tenons, wedges and dowels. Cynara is almost a century old and the deck house and the other deck furniture was in good shape, so why change now? Glue does not substitute for good joinery. With only local repairs of individual pieces the vast majority of the main deck house is original.
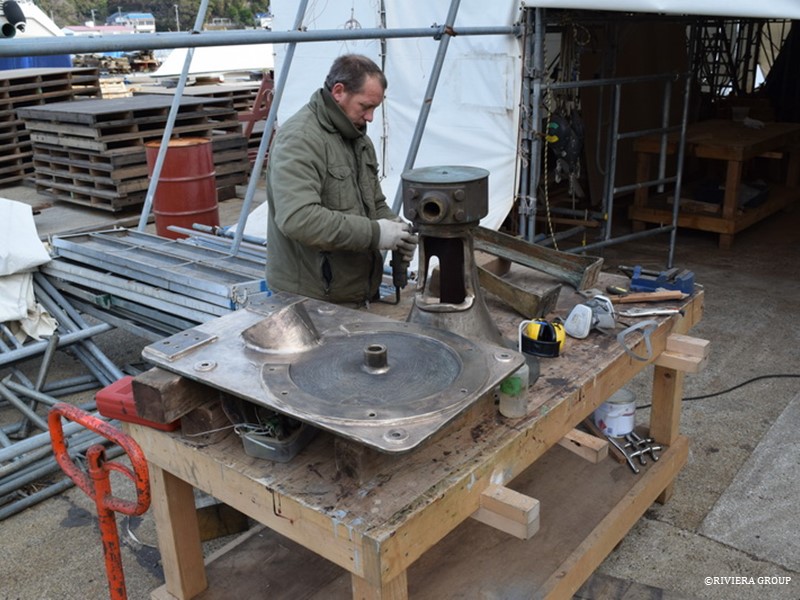
Richard checks the bronze steering gear. This is an original and will be refitted. The worm gear, cog, and the rudder indicator have been returned from Deep Blue engineering in the UK where we sent them for refurbishment.
February 23-28
Mattis hammers home the shutter plank. This is a significant moment in any build.
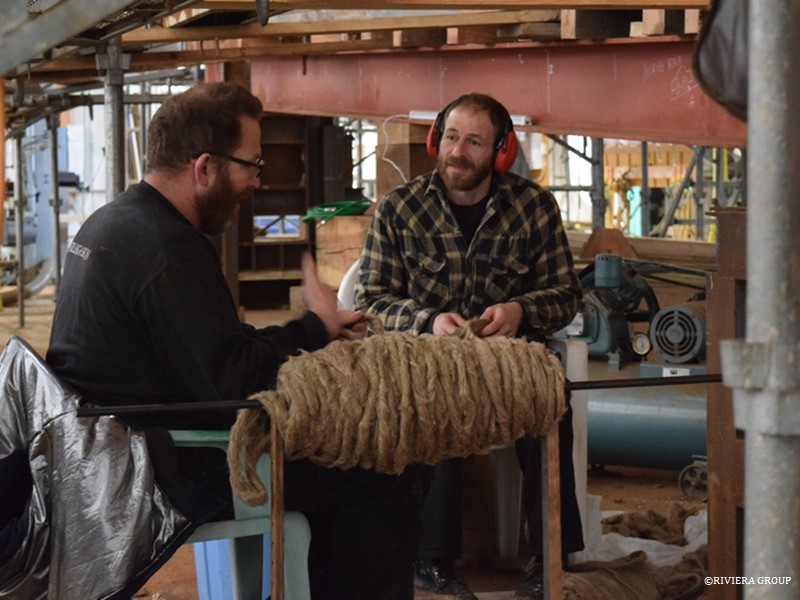
Dan and Joaquin prepare oakum before caulking. The oakum is taken off the bale, teased out and rolled. This creates a long even strand of the correct size for the seam without lumps or thin parts. It also makes caulking easier and more consistent as they work along the seams.
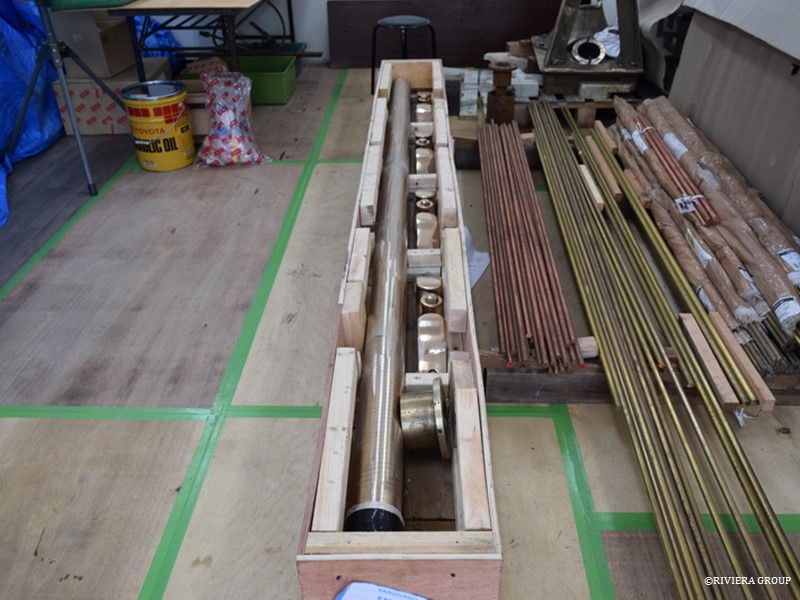
Along with the return of the steering gear parts came the rudder tube that carries the rudder post and the original bronze fairleads that have been refurbished with new bolts through the central rollers and a good polish. Also visible is our stock of naval brass and copper rod in various diameters which are used for the necessary rivets and bolts.
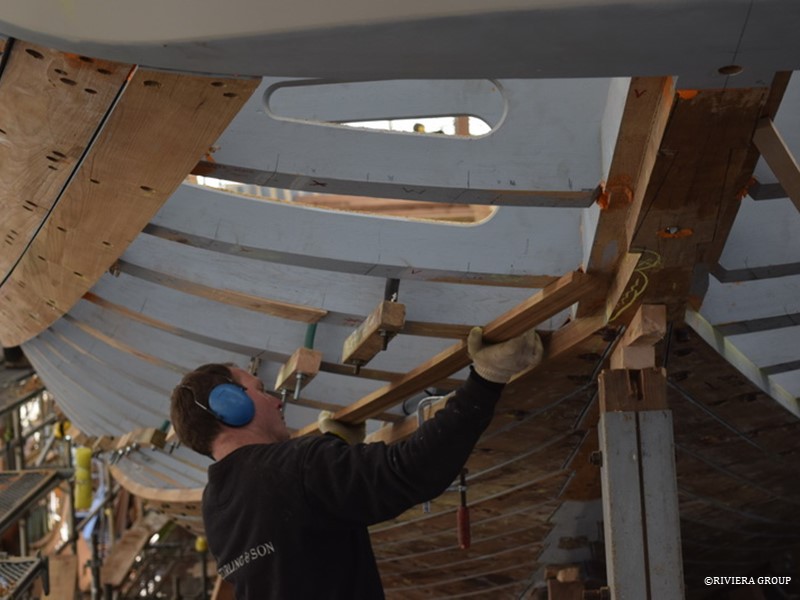
Paul fits blocking at the stem head between the stem and the first frame. Blocks of oak and teak are used between selected frame heads that will carry bolts or rivets. These blocks at the stem will give the end of the beam shelf something to sit on and will also take the bolts from the knight head chocks that will create the forward end of the bulwarks when fitted above.
When caulking is complete, the seams and oakum are painted with linseed oil and red lead. Finally, red lead putty is payed into the seams.
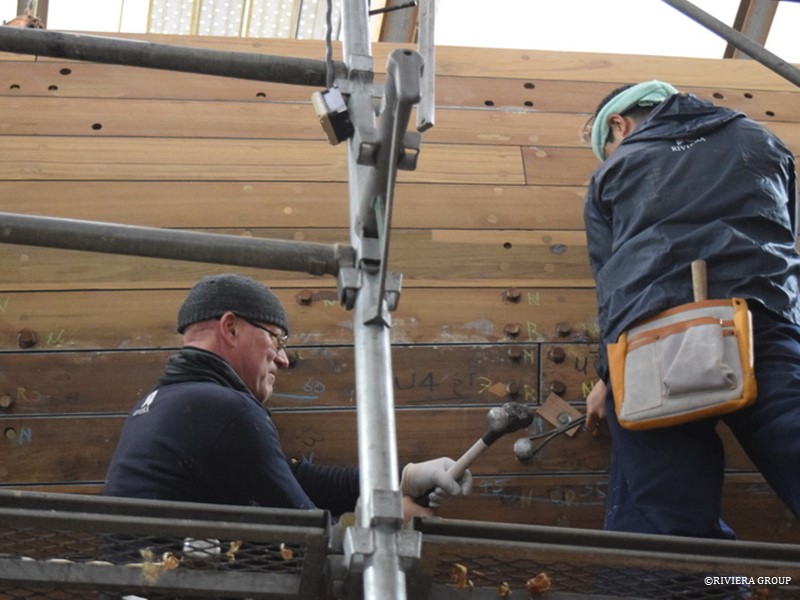
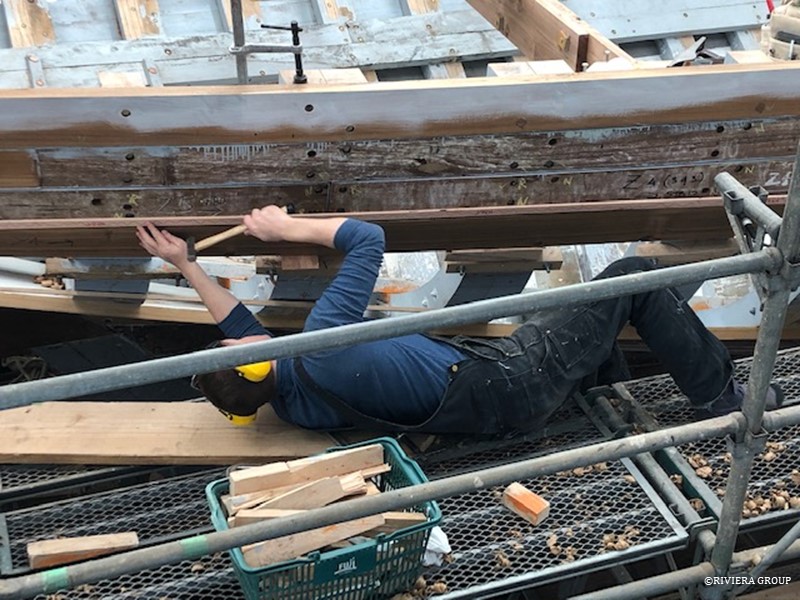
Kawashima and Pascal drive home the last rivets and dumps on the shutter planks.
Attention now moves to the wood stanchions. Although the original teak stanchions appeared to be in good condition, they had suffered damage from fresh water ingress, so it was decided to replace them. The old ones are used to set up the line for the capping rail and as patterns for the new ones. Minor adjustments can be made before new teak stanchions are cut.
The height of the rail is checked against the C&N drawings and what is found using the original stanchions in position. Having the original stanchions made finding ‘the line’ much easier.
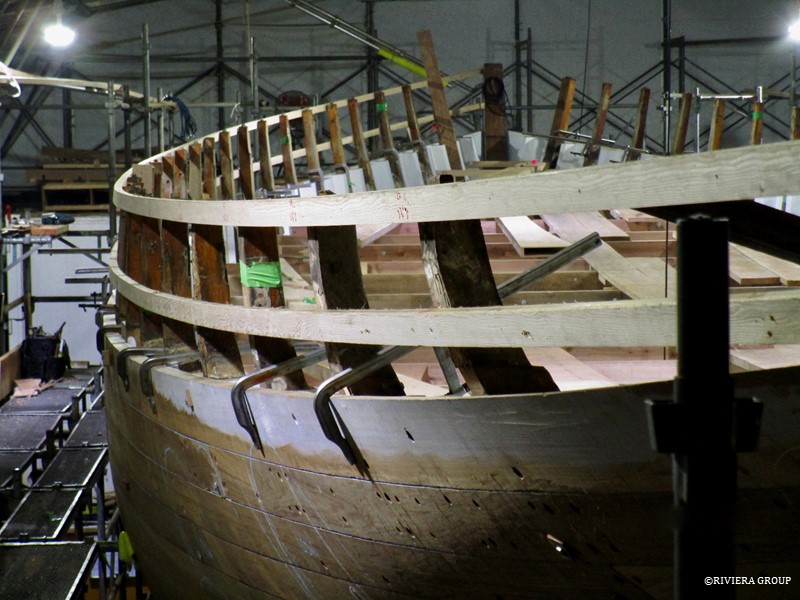
Above, here we see a slight tumblehome at the midship section, where the hull becomes narrower above the waterline. This is an important detail that greatly affects the overall look and the final shape and appearance of the hull if miscalculated or ignored.
Bevels, bolt and rivet positions are checked and marked and minor adjustments made so that the new stanchions will carry the correct bevels and curves to fit the planking snuggly. Any other adjustments are noted and transferred to the new timbers.
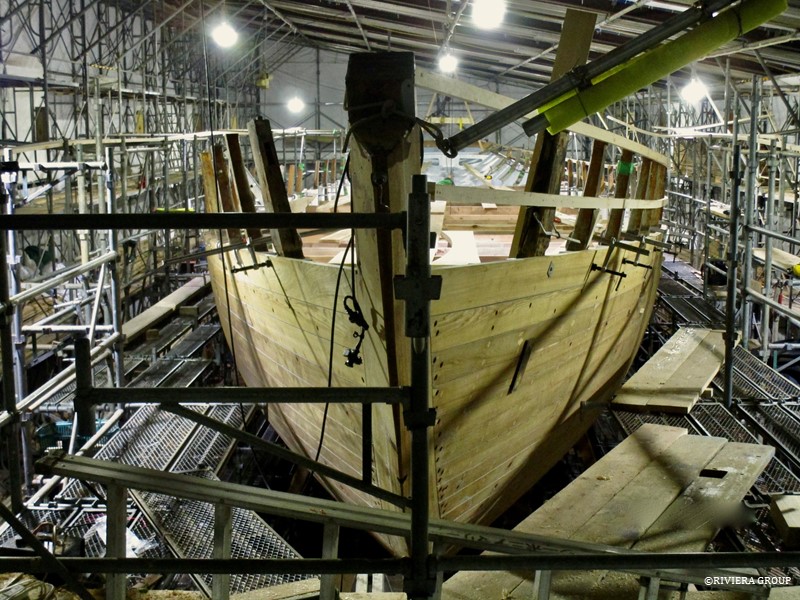
Looking back at the stem with planking complete. We’ve reached a very satisfying point in the build. Now that we have a hull, we must change focus and start looking towards the deck and its accompanying knees and hardware. Also, while the teak stanchions are cut and fitted, a first fairing of the planking can be started along with the caulking of the topsides. The hull is not ready for a final fairing as more bolts and rivets with their attendant bungs will be needed when hanging and lodging knees are fitted at the deck beam ends. These must be fitted before fairing is finished as adding rivets and bolts may move the planking and ruin any previous fairing.
Follow Us

Restoration by RIVIERA GROUP
Restoration photos by Yoichi Yabe & RIVIERA GROUP
Text and photographs copyright © 2019
RIVIERA CO., LTD. All rights reserved.
Email : pr@riviera.co.jp